
A Step-by-Step Guide to Drywall Installation on Ceilings in Wilbraham, MA
A Step-by-Step Guide to Drywall Installation on Ceilings in Wilbraham, MA
DRYWALL INSTALLATION
Jason Lebeau
1/4/20265 min read
Understanding Drywall and Its Importance in Ceiling Installation
Drywall is a building material made of a layer of gypsum plaster pressed between two thick sheets of paper. It has become a standard choice for interior walls and ceilings due to its myriad of benefits. One of the main reasons for its popularity is its durability. It can withstand minor impacts that would damage other materials, making it particularly suitable for ceiling applications.
One significant advantage of drywall is its fire resistance. This quality is particularly important for homeowners in Wilbraham, MA, as the local climate can lead to increased risks of fire incidents during dry seasons. Fire-rated drywall can slow the spread of flames and gives occupants more time to evacuate in the event of a fire. This practical benefit aligns well with the safety priorities of families in the area.
Moreover, drywall is known for its ease of installation, which can be a considerable advantage for DIY enthusiasts. Unlike traditional plastering methods, which require skilled labor, drywall can be installed relatively quickly and with basic tools, making it an accessible option for many homeowners. For those living in Wilbraham, where home improvement projects are common, the straightforward nature of drywall installation can encourage more residents to pursue personal projects.
In addition to durability and fire resistance, drywall offers excellent sound insulation properties, which can be beneficial in community-oriented neighborhoods. It provides a level of privacy from noise generated in adjacent rooms or from outside, adding to the comfort of living spaces. The ability to finish drywall with paint or wallpaper allows for customization, enabling homeowners to express their personal style while considering the aesthetic appeal of their ceilings.
Essential Tools and Materials Needed for Ceiling Drywall Installation
When undertaking a drywall installation project on ceilings, having the right tools and materials is paramount for achieving a professional finish. First and foremost, the most critical item is the drywall itself. For ceilings, it is advisable to opt for 5/8-inch thick drywall panels, known for their strength and soundproofing qualities. Additionally, for areas prone to moisture, such as bathrooms or kitchens, moisture-resistant drywall—often referred to as green board—is a beneficial choice.
Next on the list is hardware. Drywall screws are essential for securing the drywall to ceiling joists, and a box of 1-1/4 inch screws is typically suitable for most ceiling installations. It is also prudent to use drywall tape and joint compound for finishing the seams between panels, ensuring a smooth surface that is easy to paint later.
Beyond these, specialized tools will streamline the installation process. A drywall lift can be invaluable, allowing for the easy elevation of large panels to the ceiling without requiring extra hands. Other useful tools include a utility knife for cutting drywall, a T-square for ensuring precise angles, and a drill or screw gun for fasteners. A measuring tape is necessary to ensure proper measurements are taken when cutting drywall panels.
For sourcing these materials and tools in the Wilbraham area, local home improvement stores such as Home Depot and Lowe's typically carry a comprehensive selection, as do specialty building supply companies. It is also wise to consider rental options for bulky equipment like drywall lifts, which can significantly reduce project costs.
Step-by-Step Instructions for Hanging Drywall on Ceilings
Hanging drywall on ceilings is a task that requires careful planning and execution. Before beginning the installation, ensure you gather all necessary materials, including drywall sheets, screws, a drywall lift (if working solo or for heavier sheets), a T-square, a measuring tape, and safety equipment such as goggles and a dust mask.
Start by measuring the ceiling dimensions accurately. Use the measuring tape to determine the width and length, then calculate how many drywall sheets you will need. Standard drywall sheets come in 4x8 foot dimensions; however, depending on your ceiling's height and architectural style typical in Wilbraham, consider using 4x10 or 4x12 sheets to minimize joints and seams.
After measuring, carefully cut the drywall sheets to size. Use a T-square to mark the cutting line and a utility knife to score the drywall. Remember that cutting the sheets slightly smaller than the ceiling dimensions can provide an allowance for easier installation. Always make sure to measure twice before cutting to avoid waste.
When hanging the drywall, the best approach is to work from the edges inward. If you are hanging drywall alone, consider using a drywall lift to safely position the sheet against the ceiling. If you have assistance, one person can hold the sheet while another secures it with screws. Use drywall screws that are specifically designed for ceiling application, placing them every 12 inches around the perimeter and throughout the sheet to ensure a secure fit.
For ceilings common in Wilbraham, such as those with unique architectural details, be mindful of wooden beams or utilities that may interfere with installation. Always check local building codes and consider hiring a professional for specialized installations. Proper technique and safety are paramount to achieving a successful drywall ceiling in your home.
Finishing Touches: Taping, Mudding, and Painting the Drywall Ceiling
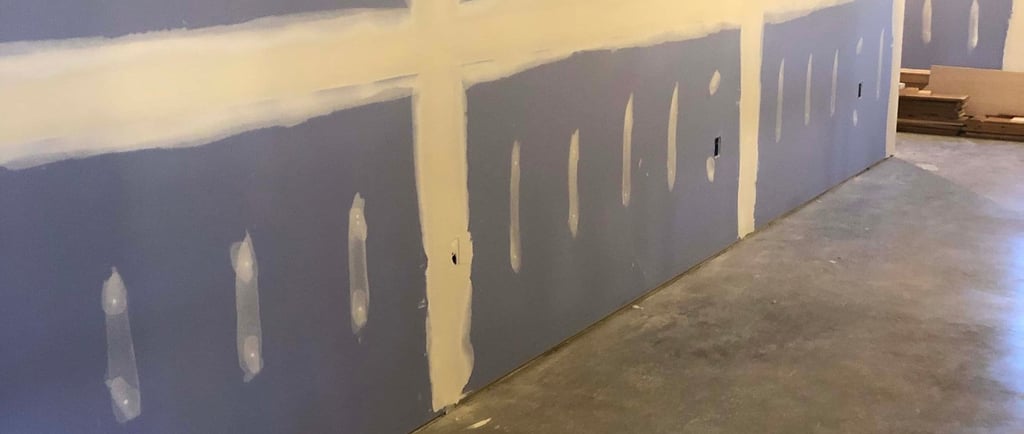
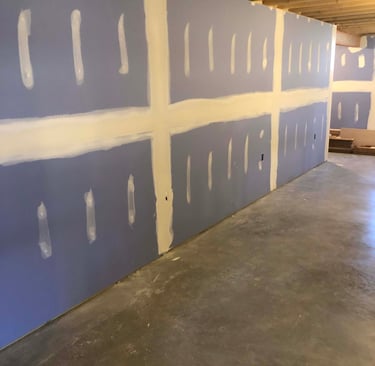
After successfully hanging the drywall on your ceiling, the next step involves the critical finishing processes of taping, mudding, and painting. This phase is essential for achieving a seamless look while enhancing the overall integrity of your drywall structure. Begin by applying drywall tape to the seams. This can be done using either paper tape or fiberglass mesh tape, although paper tape is often favored for its ability to create a smoother finish when correctly implemented. Ensure that the tape is centered over the seams and press it firmly into place, eliminating any bubbles.
Next, the initial coat of joint compound, or mud, should be applied over the taped seams using a wide drywall knife. This will effectively cover the tape while forming a base for additional layers. Allow the first coat to dry completely before applying a second layer, feathering the edges outward to achieve a more blended transition. Typically, two to three coats of mud will be necessary to create a flawless finish. Sanding in between coats is crucial. Use fine-grit sandpaper to smooth out any rough spots, and ensure to wear a mask during this process to avoid inhaling dust.
Once the final coat of mud is dry and sanded, it's time to paint your newly finished ceiling. Use a high-quality ceiling paint that is specifically designed to reduce splatter and improve application uniformity. A flat or matte finish is ideal as it helps conceal imperfections. Additionally, ensure adequate ventilation in the room during painting to allow for proper airflow and drying. While this task can often be handled independently, do not hesitate to contact local resources in Wilbraham, MA, to find professional help or necessary finishing supplies, as these can greatly enhance the quality of your work and save you time. Some common mistakes to avoid include skimping on materials, rushing the drying times, and neglecting safety precautions. By following these guidelines, your drywall ceiling project will culminate in a stunning finish.
Patchwork. |. Water Damage. |. Drywall Hanging. |. Wallpaper Removal. |. Drywall Taping. |. Popcorn Ceilings. |. Texture |. Blog. |
Address
600 E Main St
Chicopee, MA 01020